Object Properties
How to change an object's appearance and geometry after it's created.
Changing Visual Properties
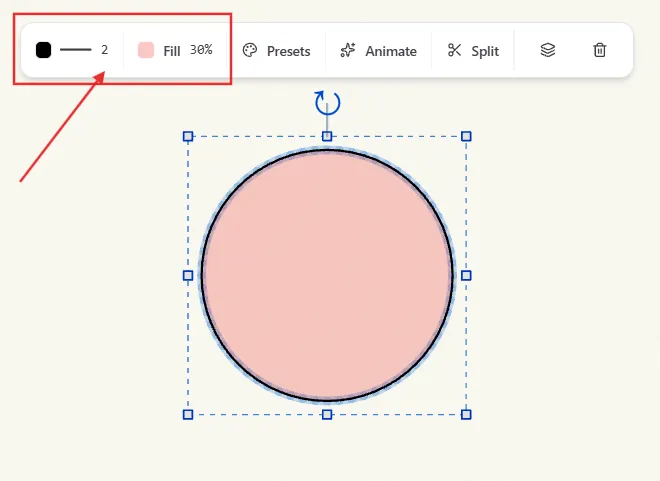
Select any object and a small floating toolbar appears above it with quick controls for how it looks: a stroke swatch, a fill swatch, and a Presets button — plus a few other buttons (Animate, Split, layer order, delete) covered elsewhere in this guide.
-
Stroke — click the stroke swatch to open a panel with three line styles (solid, dashed, dotted), a thickness slider, and a color grid with a custom color picker below it.
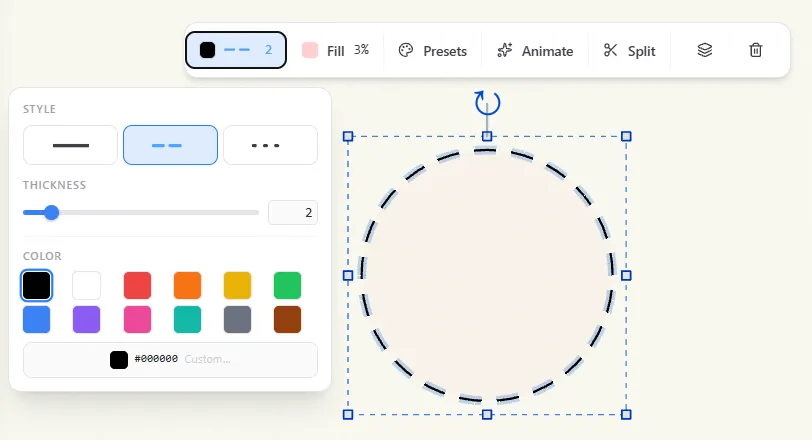
Fig. 1.3.2 — Stroke SettingsLine style, thickness, and color controls for a selected object's outline. -
Fill — click the Fill swatch for the same color grid — plus a "no fill" option — and an opacity slider. Turning on a fill color for the first time defaults it to 30% opacity so the shape is visibly filled right away instead of invisible until you find the slider.
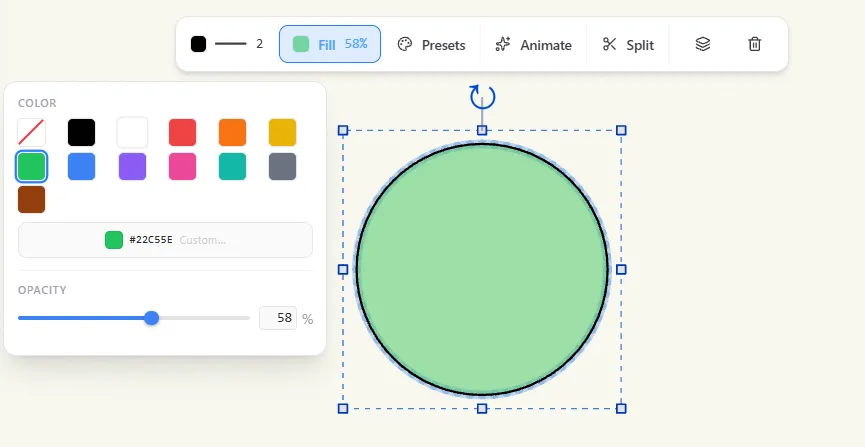
Fig. 1.3.3 — Fill SettingsColor and opacity controls for a selected object's fill. -
Presets — click Presets for ready-made looks: Construction (thin dashed outline, no fill), Primary (heavy outline with a blue fill), Indicator (a plain thin line), Highlight (amber fill for calling attention to something), and Subdued (a faded, low-opacity look) — plus a row of Color Combos that set stroke and fill to the same color in one click, with the fill kept at a light opacity so the shape stays readable.
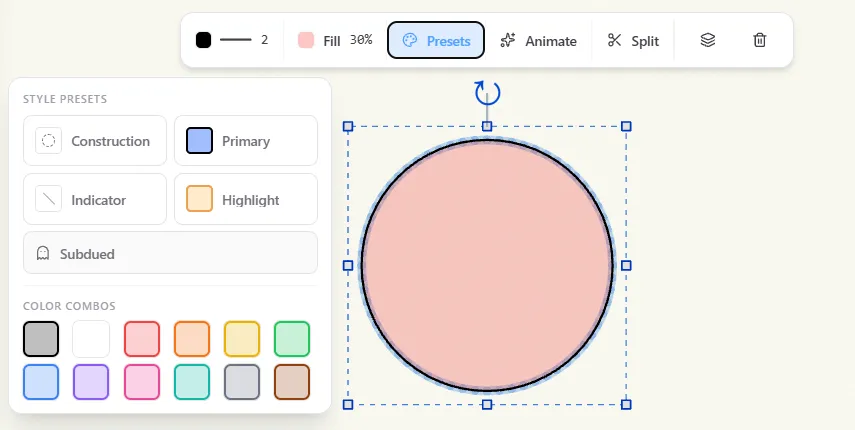
Fig. 1.3.4 — Style PresetsReady-made stroke-and-fill combinations, plus single-click color combos.
Changing Geometric Parameters
Radius, triangle vertices, and similar parameters.
Geometry Handles
Select a single object and colored handles appear directly on its geometry — separate from the blue square resize handles of the general selection box. Each handle controls one specific parameter: drag a Circle's handle to change its radius, a Line's two handles to move its endpoints, a Triangle or Polygon's per-vertex handles to reshape it, a Bezier's control points to bend its curve. Hold Shift while dragging to constrain the drag to one axis. The same grid and object snapping that applies while placing a new point also applies here.
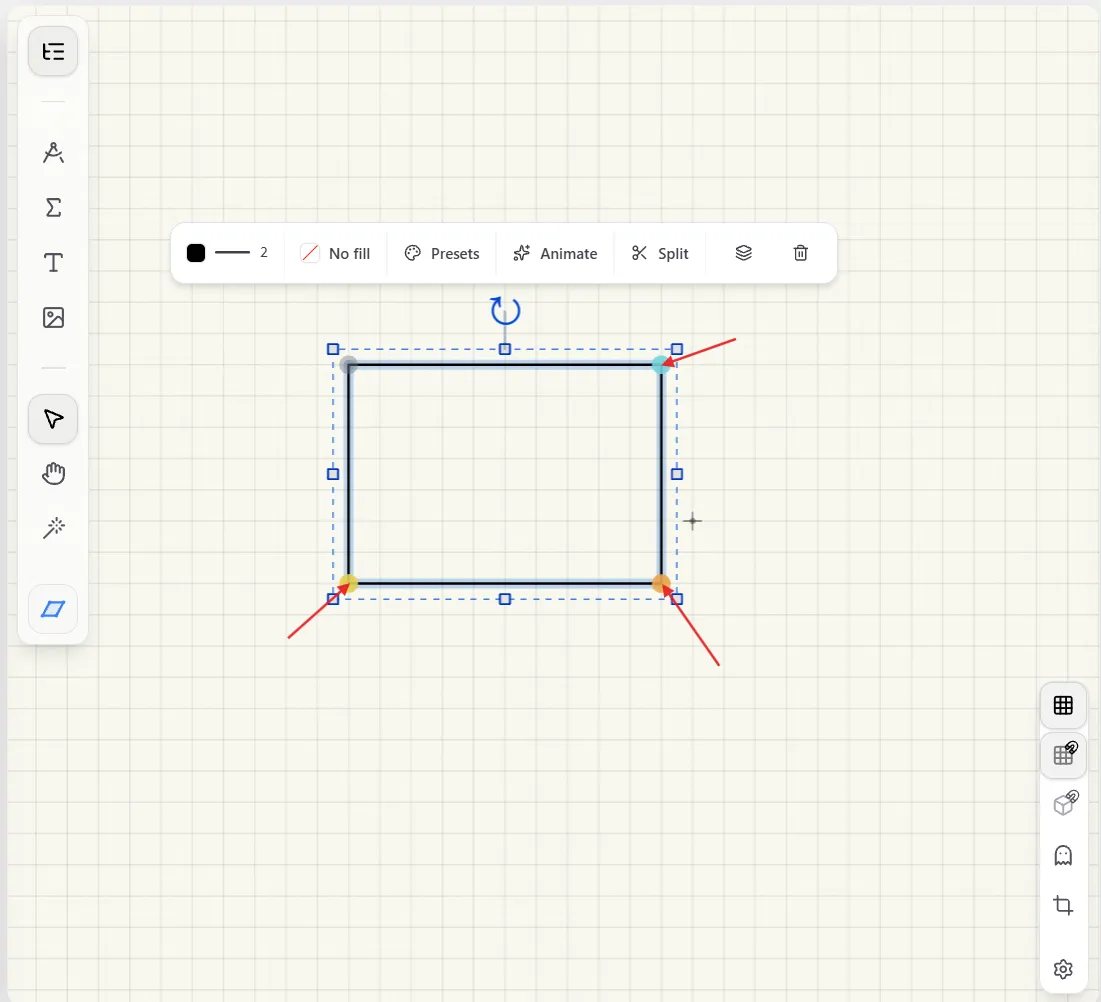

Geometry handles don't appear while panning, while an animation-creation tool is active, during playback, or for a multi-object selection — they only make sense for one object's own geometry at a time.
Set as Start State
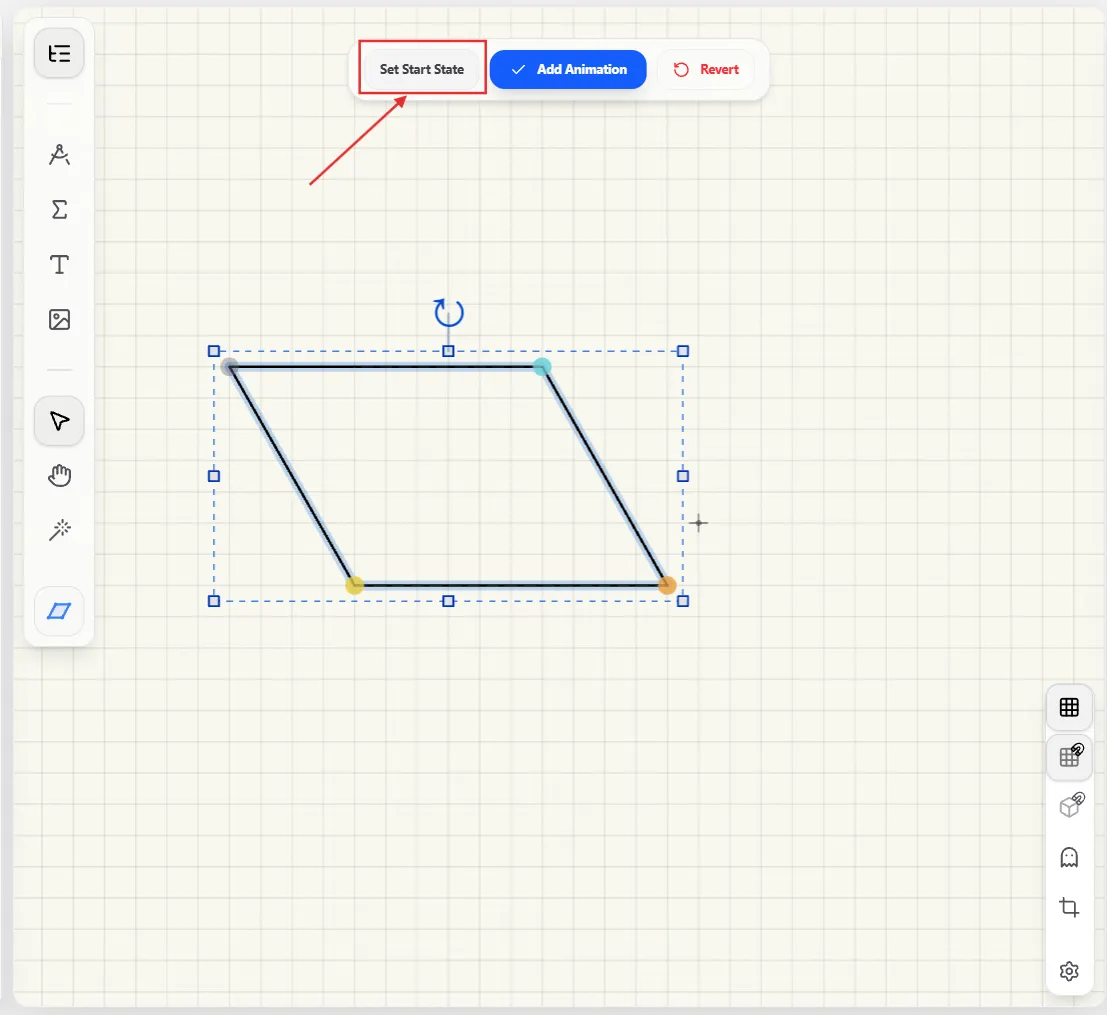
After you drag a geometry handle (or move, rotate, or scale an object with the regular gizmo), a small bar appears above it with three choices:
- Set Start State — bakes the new shape in as the object's resting state, with no animation. Use this while you're still composing the object's default look.
- Add Animation — keeps the object's original shape as-is and creates a new animation that morphs it into the new shape over time.
- Revert — discards the change and restores the object to how it looked before you dragged the handle.
Editing Through the Floating Bar
A few object types have their content, not just their appearance, defined through the same floating toolbar — a dedicated panel replaces the usual gizmo-based editing.
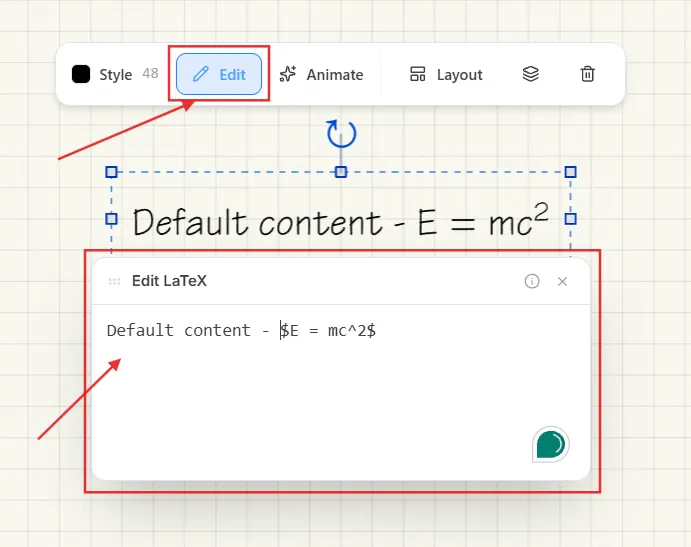
LaTeX — Edit
Select a LaTeX object and click Edit on the floating toolbar to open the Edit LaTeX panel — a plain text box where you type LaTeX source (wrap math in $...$) and see it rendered live above as you type.
Function Objects — Edit Curve
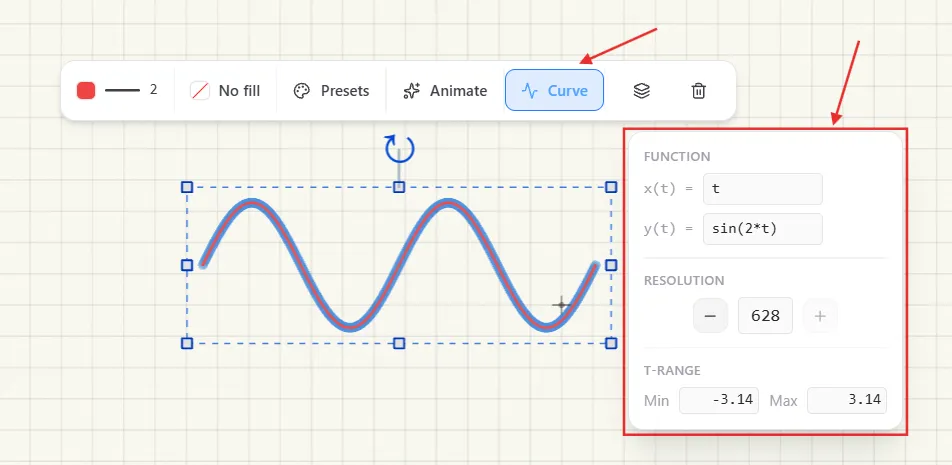
Select a Parametric Function and click Curve to edit its defining formulas directly: x(t) and y(t) expressions, a Resolution stepper (how many segments make up the curve — higher is smoother but more expensive to render), and a t-range Min/Max.
Bezier — Edit Points
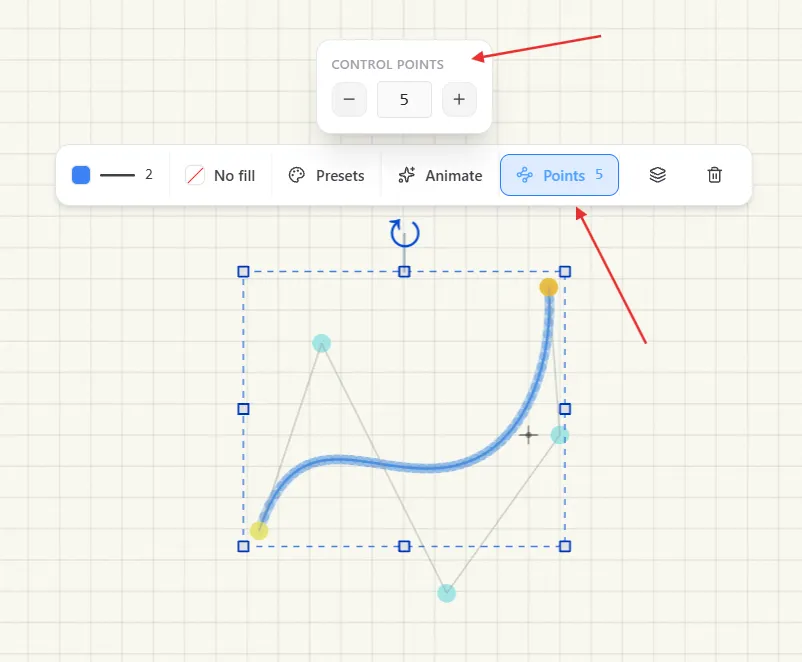
Select a Bezier curve and click Points to add or remove control points with a stepper, from 2 up to 12. Each point can then be dragged directly on the canvas — endpoints in yellow and orange, the control points that shape the curve between them in cyan.