Editing a Recording
Split
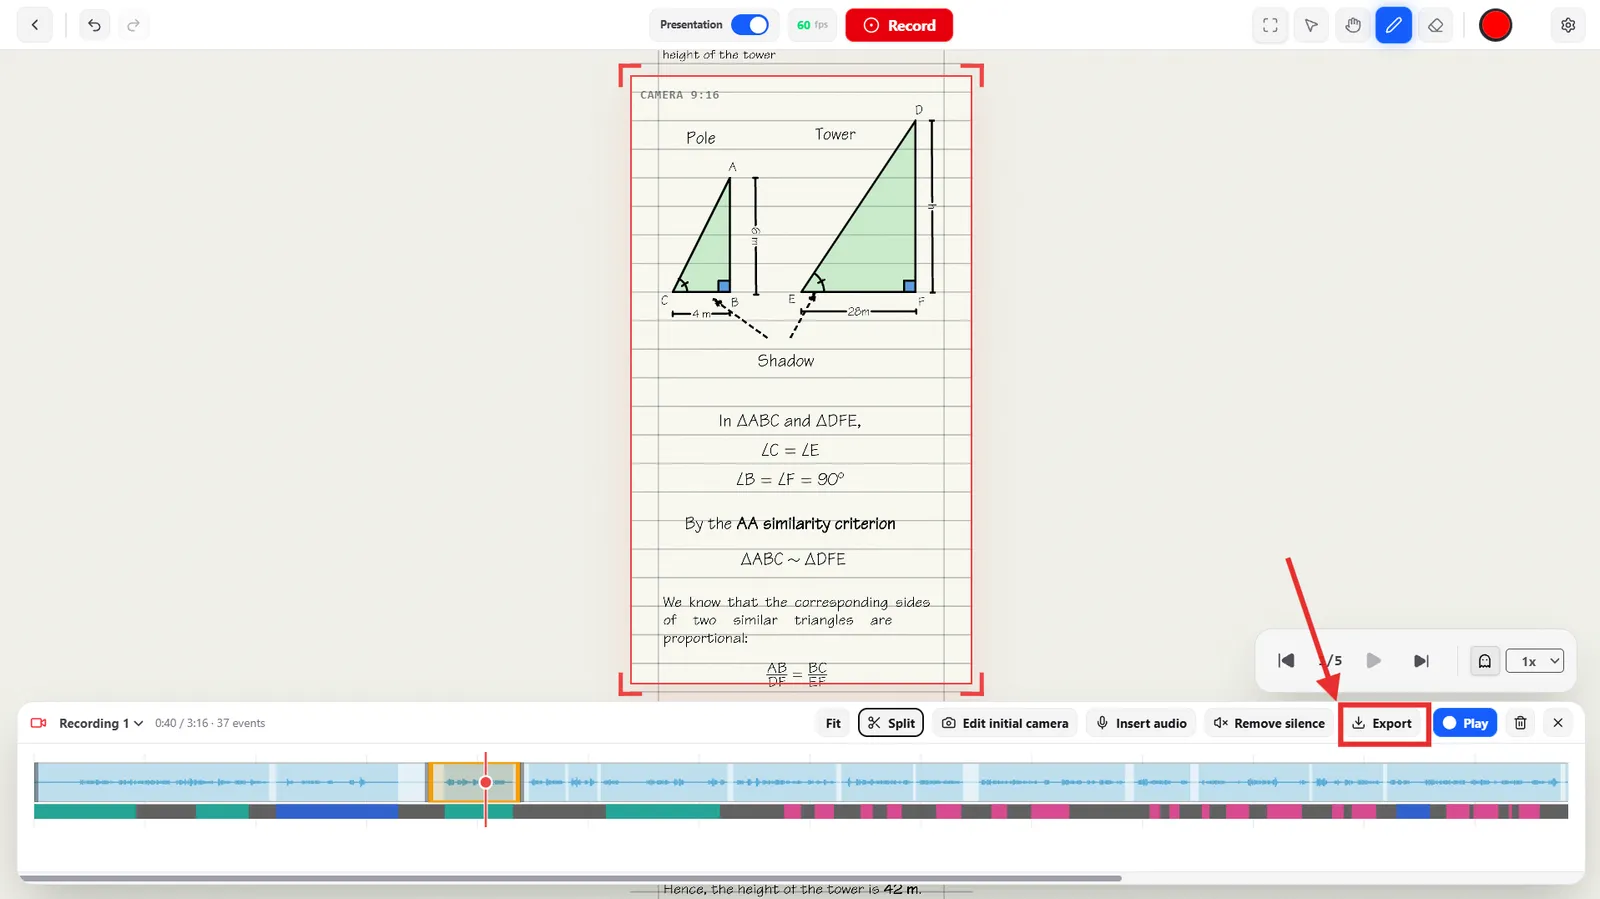
Select an event on the timeline (or leave nothing selected to target the audio track), position the playhead where you want the cut, then click Split — or press Ctrl/Cmd + B. The event or audio clip is divided into two independent pieces at that point.
Remove Silences


Sparked Viz highlights detected gaps of silence in the audio waveform. Click Remove silence to cut every highlighted gap out of the recording at once, shortening its total length. The button is disabled once there's nothing left to remove.
Rearranging Actions

Click an action on the timeline to select it, then drag from its middle to move it to a different point in time. Drag from either edge instead to trim how long it lasts.
Export
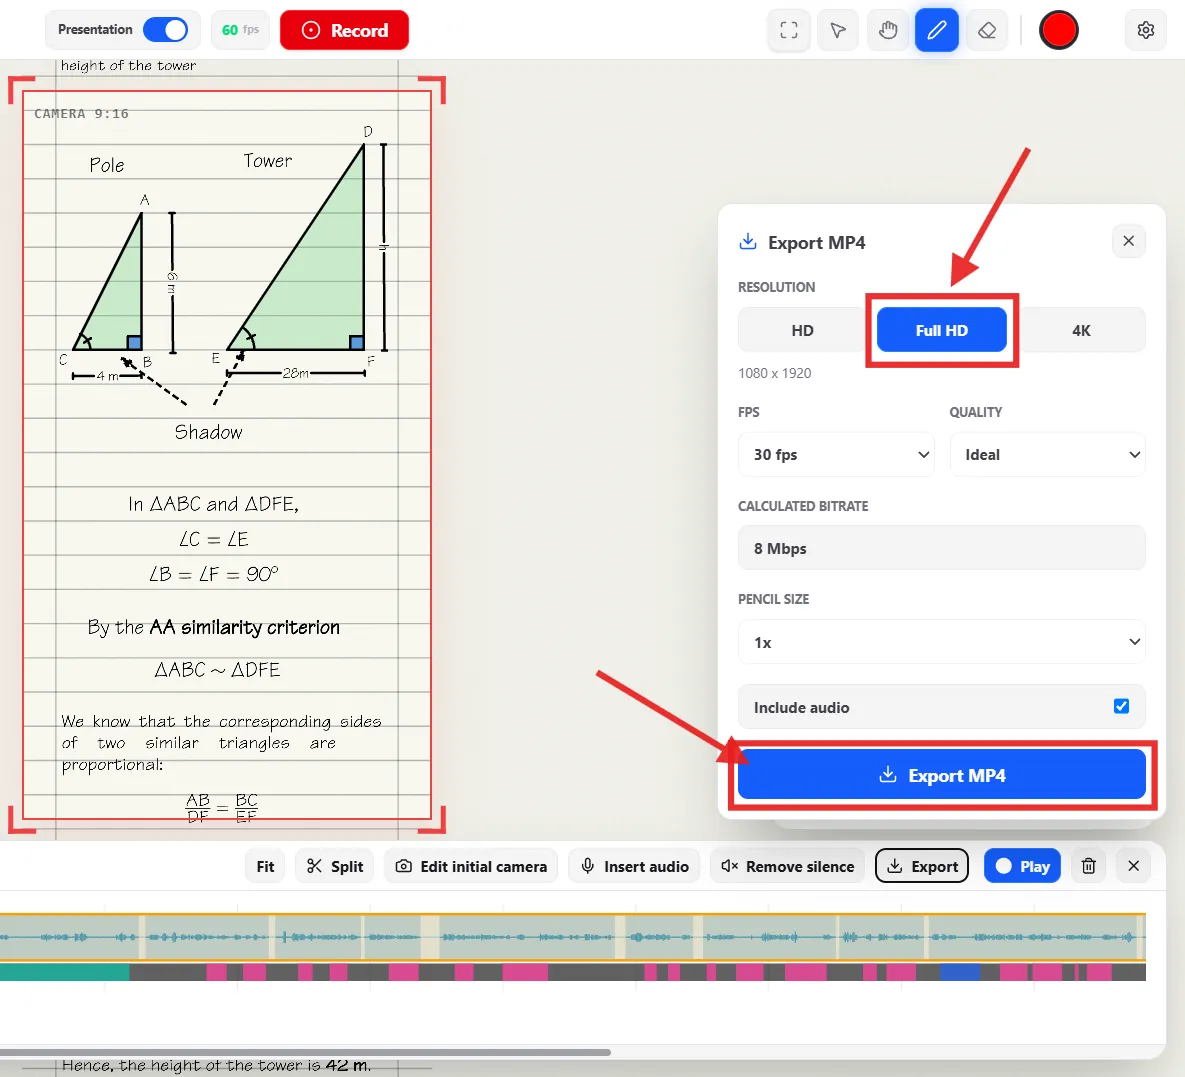
Click Export to open the Export MP4 panel.
Choose a Resolution (HD, Full HD, or 4K — Full HD and 4K require Premium; free exports are capped at 720p and get a 2-second "Made with Viz" end card), an FPS (24, 30, or 60), a Quality (Low, Ideal, or High), a Pencil size (0.5x–2x, scaling annotation strokes in the export), and whether to Include audio. Click Export MP4 to render and save the file.