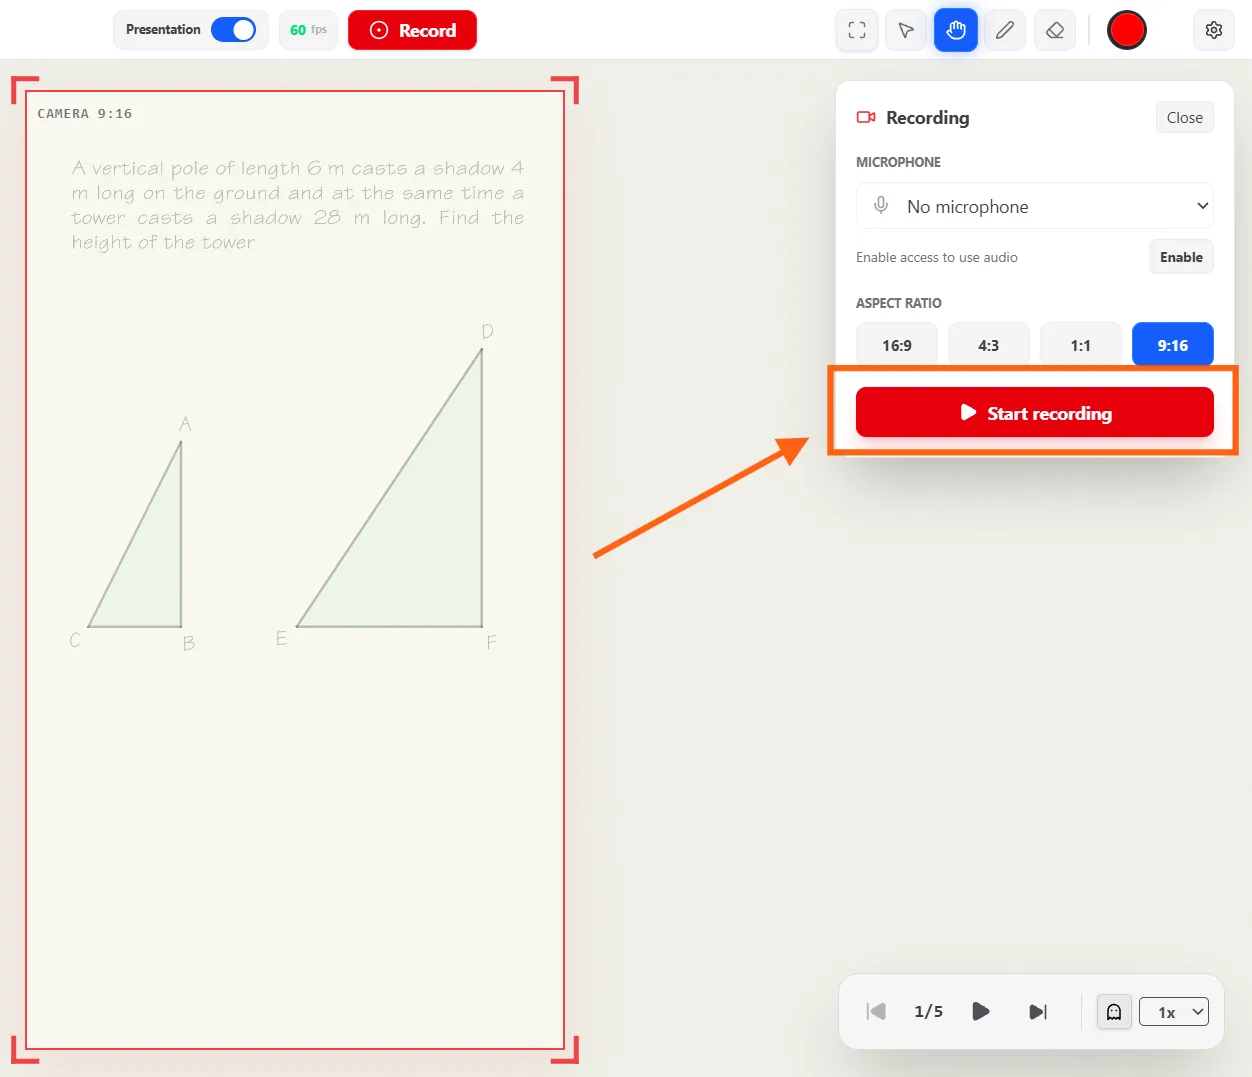
Recording
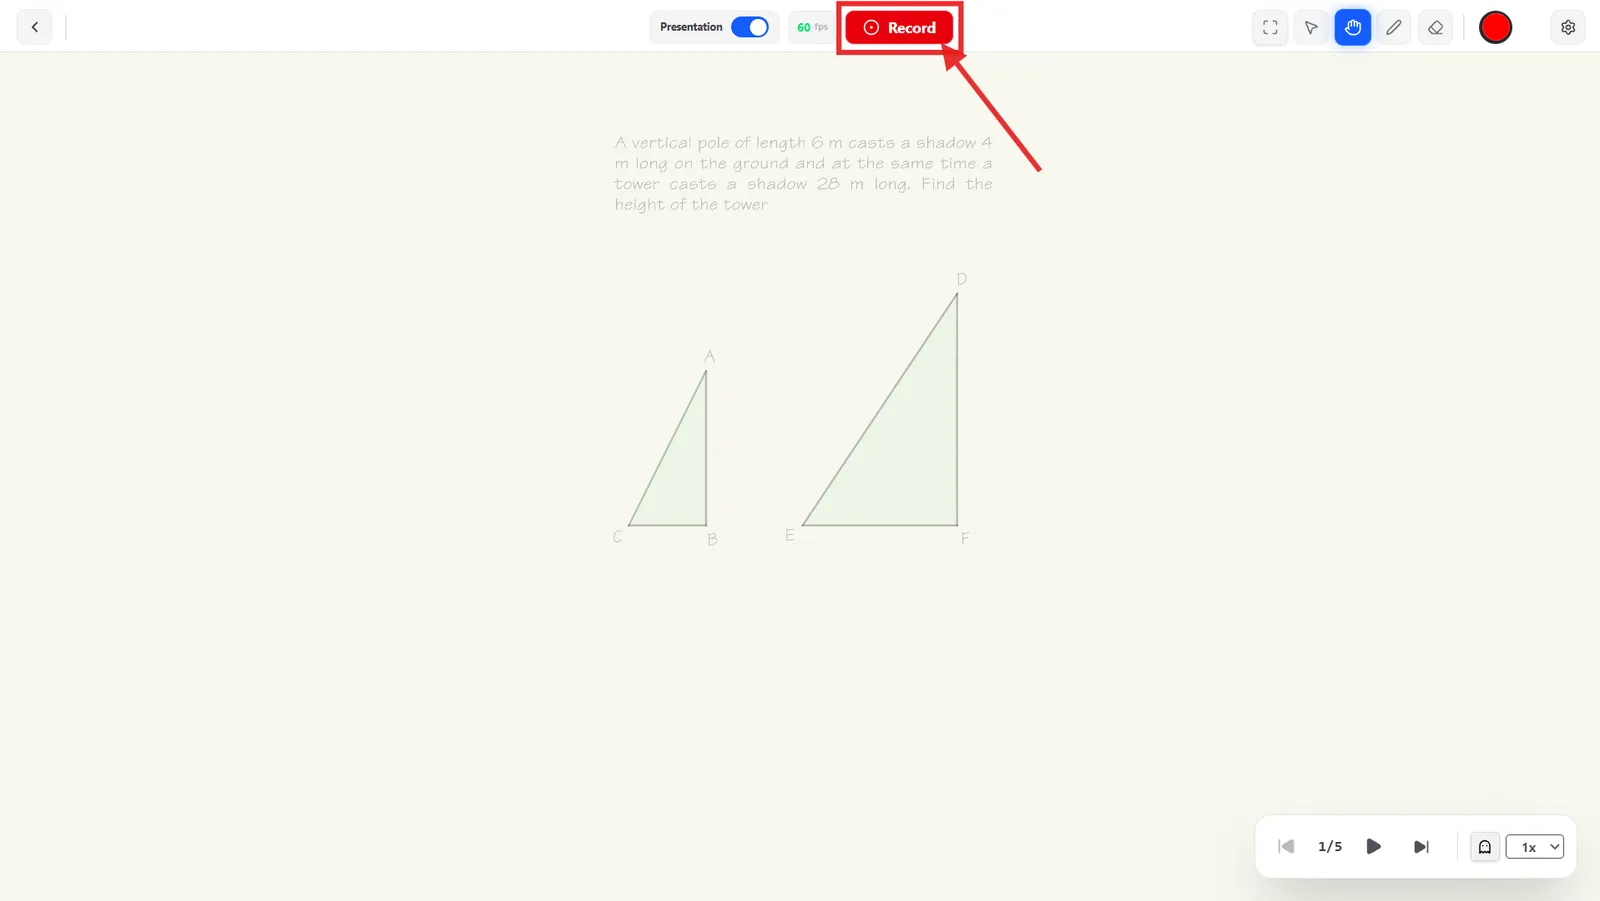
Click Record
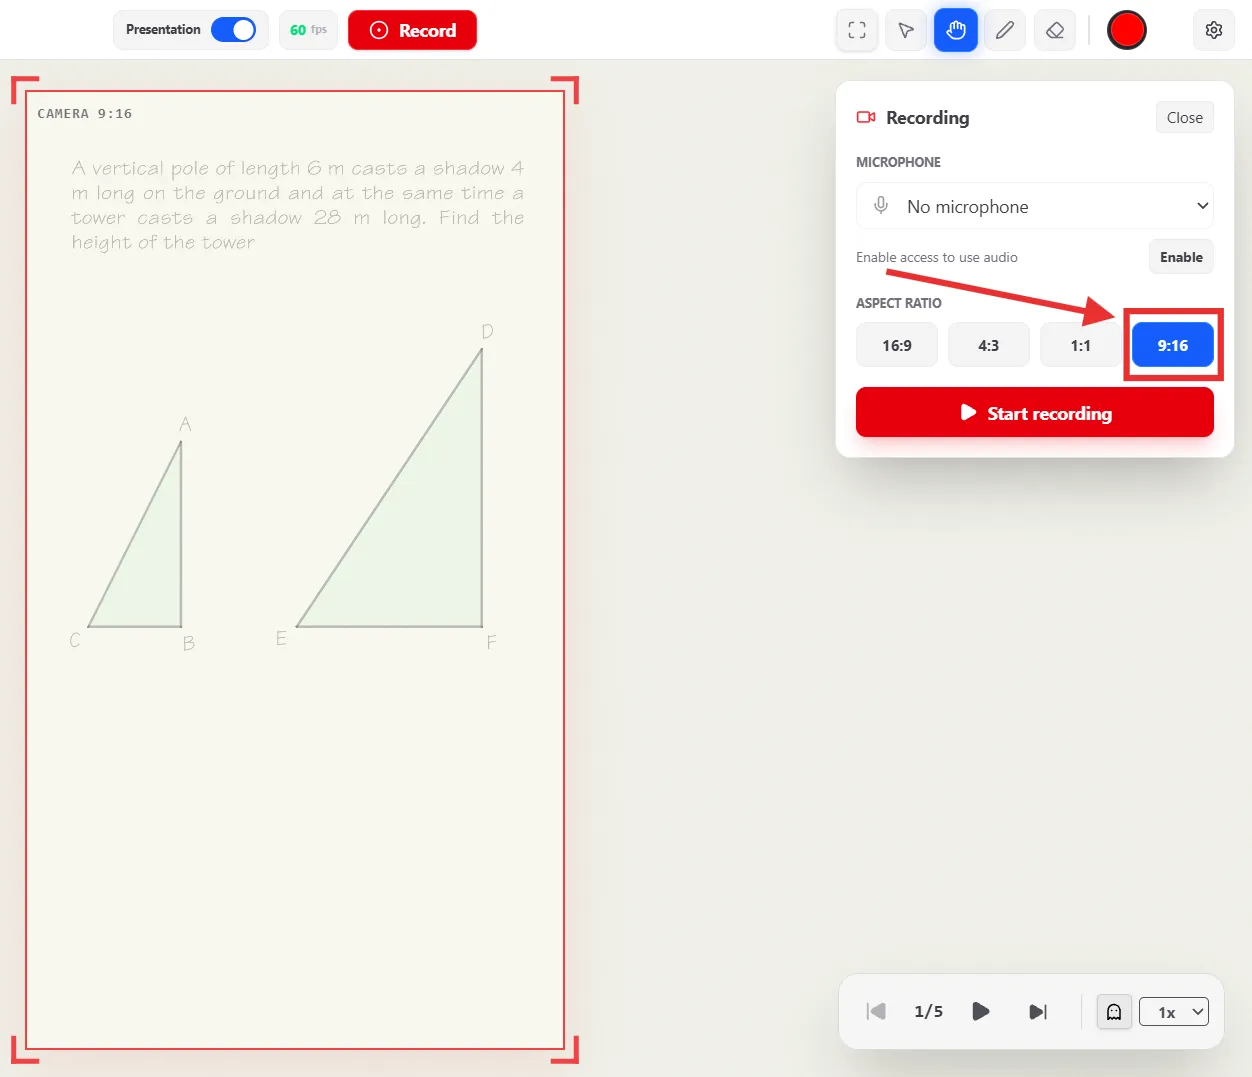
Click Record in the header to open the recording setup panel. A red viewfinder frame appears on the canvas showing exactly what will be captured, alongside a panel for choosing your microphone and aspect ratio before you start.
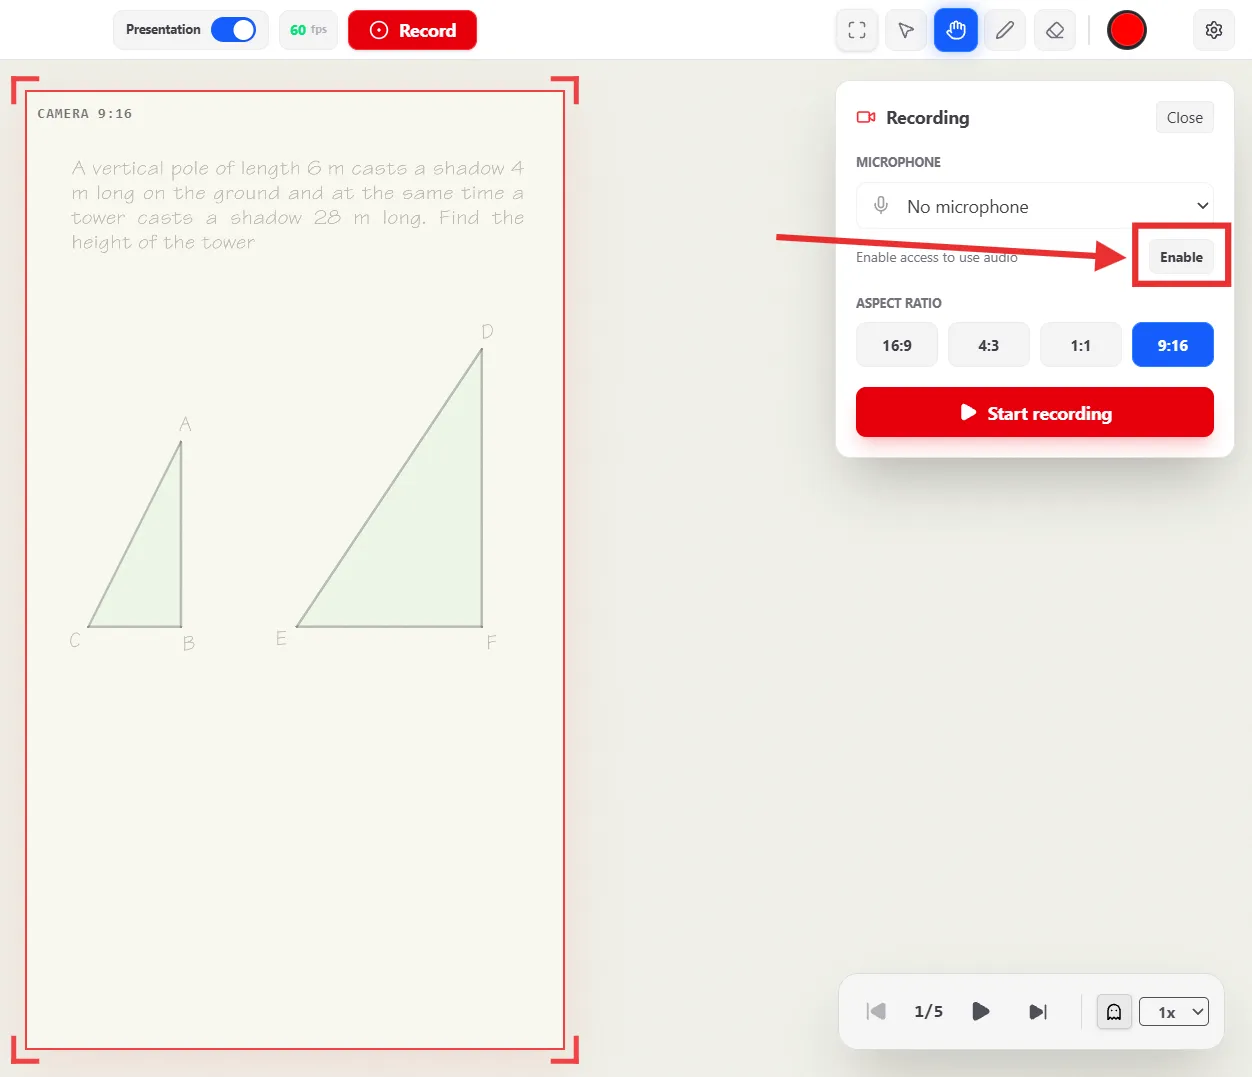
Microphone Permission
The Microphone dropdown starts on "No microphone," with a message reading "Enable access to use audio." Click Enable to grant the browser access to your mic — until you do, no audio input is available to select.
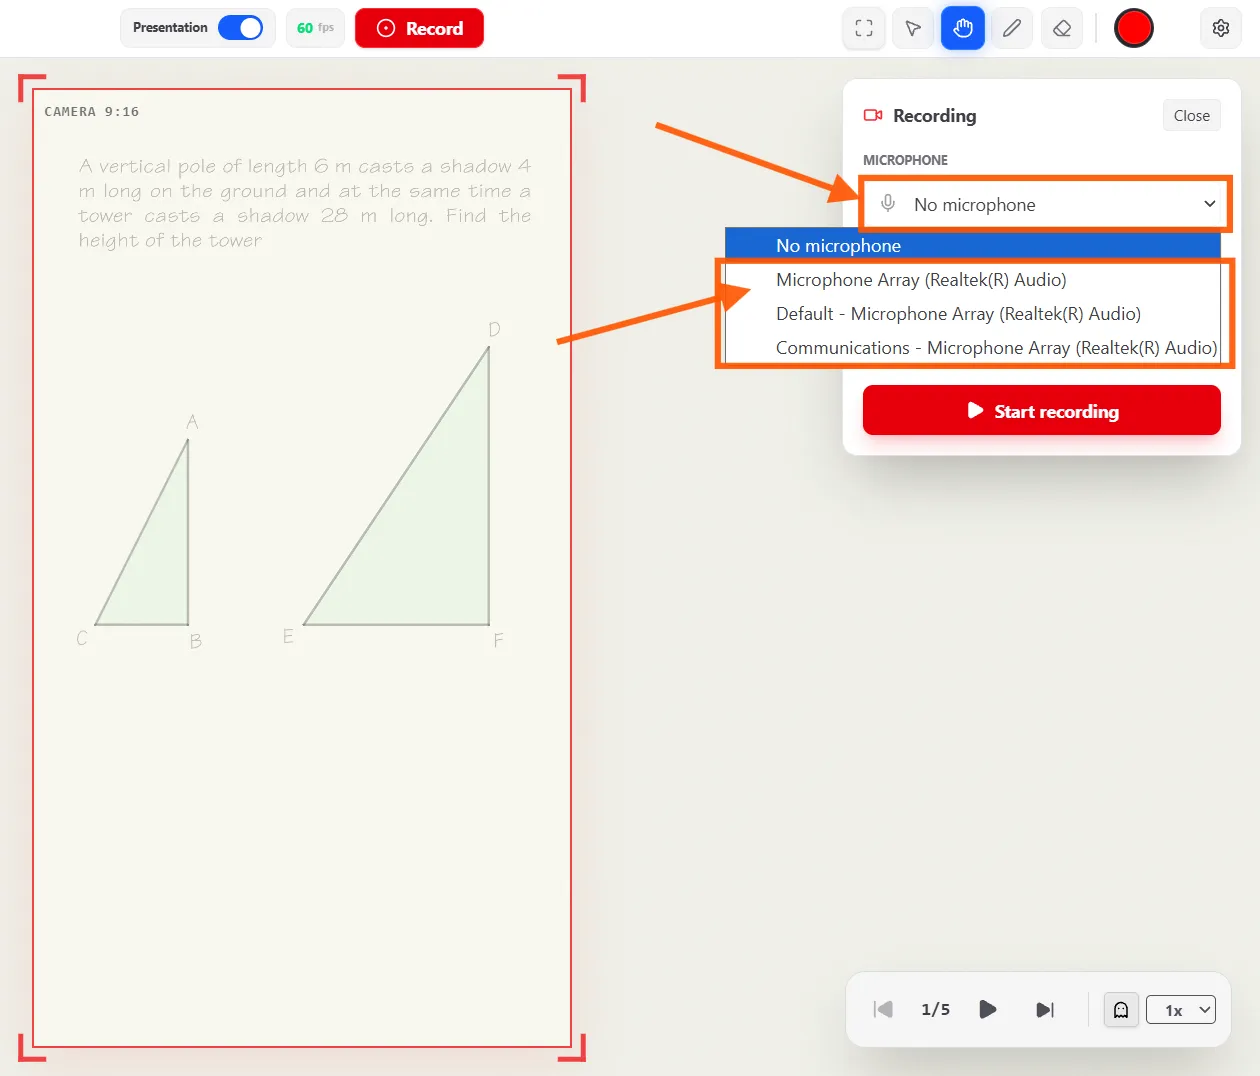
Selecting the Microphone
Once access is granted, the dropdown lists every audio input device connected to your computer. Pick one to use it for the recording.
Selecting the Aspect Ratio
Choose 16:9, 4:3, 1:1, or 9:16. The red viewfinder frame on the canvas resizes to match, so you can see exactly what will be captured before you start recording.
Start Recording
Click Start recording to begin. Sparked Viz jumps to the first step, switches into Explanar (presentation) mode, and automatically selects the Pencil tool so you're ready to annotate as soon as capture starts.